
- Home
- SEODiscover the latest updates from across the United States, including politics, culture, economy, and trending stories. Stay informed on the key events shaping the nation and the topics everyone’s talking about.
- Technical SEOLearn technical SEO concepts including crawling, indexing, XML sitemaps, robots.txt, canonical tags, site architecture, and website performance.
- Local SEOOptimize your business for local seo with Google Business Profile, local citations, reviews, maps, and location-based SEO.
- Mobile SEOImprove your website’s mobile seo performance with responsive design, mobile-first indexing, usability, and page speed optimization.
- On-Page SEOExplore on-page seo optimization techniques such as title tags, meta descriptions, headings, URLs, internal linking, and content optimization.
- Off-Page SEODiscover off-page SEO strategies such as backlinks, digital PR, brand mentions, outreach, and authority building.
- SEO ToolsExplore the best SEO tools for keyword research, technical audits, backlink analysis, rank tracking, and website optimization.
- Core Web VitalsLearn how to improve Core Web Vitals including LCP, INP, CLS, page speed, and overall user experience for better rankings.
- Keyword ResearchLearn how to find profitable keywords, analyze search intent, evaluate competition, and build effective keyword strategies.
- Link BuildingMaster ethical link building techniques, backlink analysis, outreach methods, guest posting, and authority growth strategies.
- Google Search ConsoleLearn how to use Google Search Console to monitor indexing, fix errors, analyze search performance, and improve SEO.
- SEO BasicsLearn the fundamentals of search engine optimization (SEO Basics), including how search engines work, SEO terminology, and beginner-friendly best practices.
- Paid Media
- Display AdvertisingLearn display advertising strategies, banner ads, audience targeting, remarketing, Google Display campaigns, and optimization techniques.
- Google AdsLearn Google Ads strategies, campaign setup, bidding, keywords, Performance Max, Search Ads, and optimization techniques.
- LinkedIn AdsLearn LinkedIn Ads strategies for B2B marketing, lead generation, audience targeting, campaign optimization, and paid social advertising.
- Meta AdsLearn Meta Ads strategies for Facebook and Instagram, including campaign setup, targeting, retargeting, and performance optimization.
- Paid Media AnalyticsLearn paid media analytics, including CPC, CTR, CPA, ROAS, conversion tracking, attribution, reporting, and campaign performance analysis.
- PPC StrategyLearn effective PPC strategies, campaign planning, bidding, keyword targeting, landing pages, conversion optimization, and more.
- ContentTransform your living spaces with inspiration, tips, and trends in interior design. From minimalist decor to bold statements, find ideas for every style and budget.
- Social
- Digital MarketingExplore stories and advice on living your best life. From personal growth to entertainment, dive into the latest in lifestyle trends and inspiration.
- Artificial IntelligenceStay informed about health and wellness with expert advice, fitness tips, and the latest medical breakthroughs. Your guide to a healthier and happier life.
- DevelopmentYou will find development related educational articles
- GTMLearn Google Tag Manager (GTM) with practical guides for tags, triggers, variables, tracking, conversions, and website analytics implementation.
- HTMLLearn HTML with simple tutorials, examples, tags, elements, attributes, and best practices for building modern web pages.
- HTML CSSLearn HTML CSS together with practical tutorials, examples, layouts, styling techniques, responsive design, and modern web development practices.
- HTML JSLearn HTML JS – JavaScript with practical tutorials and examples for adding interactivity, dynamic content, events, and functionality to web pages.
- JavaScriptExplore JavaScript tutorials, examples, concepts, and practical techniques for creating interactive and dynamic websites and web applications.
- PHPLearn PHP programming with practical tutorials, examples, functions, syntax, and web development techniques for beginners and developers.
- PythonLearn Python programming with practical tutorials, examples, syntax, functions, automation techniques, and useful programming concepts.
- Home
- SEODiscover the latest updates from across the United States, including politics, culture, economy, and trending stories. Stay informed on the key events shaping the nation and the topics everyone’s talking about.
- Technical SEOLearn technical SEO concepts including crawling, indexing, XML sitemaps, robots.txt, canonical tags, site architecture, and website performance.
- Local SEOOptimize your business for local seo with Google Business Profile, local citations, reviews, maps, and location-based SEO.
- Mobile SEOImprove your website’s mobile seo performance with responsive design, mobile-first indexing, usability, and page speed optimization.
- On-Page SEOExplore on-page seo optimization techniques such as title tags, meta descriptions, headings, URLs, internal linking, and content optimization.
- Off-Page SEODiscover off-page SEO strategies such as backlinks, digital PR, brand mentions, outreach, and authority building.
- SEO ToolsExplore the best SEO tools for keyword research, technical audits, backlink analysis, rank tracking, and website optimization.
- Core Web VitalsLearn how to improve Core Web Vitals including LCP, INP, CLS, page speed, and overall user experience for better rankings.
- Keyword ResearchLearn how to find profitable keywords, analyze search intent, evaluate competition, and build effective keyword strategies.
- Link BuildingMaster ethical link building techniques, backlink analysis, outreach methods, guest posting, and authority growth strategies.
- Google Search ConsoleLearn how to use Google Search Console to monitor indexing, fix errors, analyze search performance, and improve SEO.
- SEO BasicsLearn the fundamentals of search engine optimization (SEO Basics), including how search engines work, SEO terminology, and beginner-friendly best practices.
- Paid Media
- Display AdvertisingLearn display advertising strategies, banner ads, audience targeting, remarketing, Google Display campaigns, and optimization techniques.
- Google AdsLearn Google Ads strategies, campaign setup, bidding, keywords, Performance Max, Search Ads, and optimization techniques.
- LinkedIn AdsLearn LinkedIn Ads strategies for B2B marketing, lead generation, audience targeting, campaign optimization, and paid social advertising.
- Meta AdsLearn Meta Ads strategies for Facebook and Instagram, including campaign setup, targeting, retargeting, and performance optimization.
- Paid Media AnalyticsLearn paid media analytics, including CPC, CTR, CPA, ROAS, conversion tracking, attribution, reporting, and campaign performance analysis.
- PPC StrategyLearn effective PPC strategies, campaign planning, bidding, keyword targeting, landing pages, conversion optimization, and more.
- ContentTransform your living spaces with inspiration, tips, and trends in interior design. From minimalist decor to bold statements, find ideas for every style and budget.
- Social
- Digital MarketingExplore stories and advice on living your best life. From personal growth to entertainment, dive into the latest in lifestyle trends and inspiration.
- Artificial IntelligenceStay informed about health and wellness with expert advice, fitness tips, and the latest medical breakthroughs. Your guide to a healthier and happier life.
- DevelopmentYou will find development related educational articles
- GTMLearn Google Tag Manager (GTM) with practical guides for tags, triggers, variables, tracking, conversions, and website analytics implementation.
- HTMLLearn HTML with simple tutorials, examples, tags, elements, attributes, and best practices for building modern web pages.
- HTML CSSLearn HTML CSS together with practical tutorials, examples, layouts, styling techniques, responsive design, and modern web development practices.
- HTML JSLearn HTML JS – JavaScript with practical tutorials and examples for adding interactivity, dynamic content, events, and functionality to web pages.
- JavaScriptExplore JavaScript tutorials, examples, concepts, and practical techniques for creating interactive and dynamic websites and web applications.
- PHPLearn PHP programming with practical tutorials, examples, functions, syntax, and web development techniques for beginners and developers.
- PythonLearn Python programming with practical tutorials, examples, syntax, functions, automation techniques, and useful programming concepts.
Now Reading: GA4 Custom Event Tracking Using Google Tag Manager
-
01
GA4 Custom Event Tracking Using Google Tag Manager
- Home//
- SEO//Discover the latest updates from across the United States, including politics, culture, economy, and trending stories. Stay informed on the key events shaping the nation and the topics everyone’s talking about.
- Technical SEO//Learn technical SEO concepts including crawling, indexing, XML sitemaps, robots.txt, canonical tags, site architecture, and website performance.
- Local SEO//Optimize your business for local seo with Google Business Profile, local citations, reviews, maps, and location-based SEO.
- Mobile SEO//Improve your website’s mobile seo performance with responsive design, mobile-first indexing, usability, and page speed optimization.
- On-Page SEO//Explore on-page seo optimization techniques such as title tags, meta descriptions, headings, URLs, internal linking, and content optimization.
- Off-Page SEO//Discover off-page SEO strategies such as backlinks, digital PR, brand mentions, outreach, and authority building.
- SEO Tools//Explore the best SEO tools for keyword research, technical audits, backlink analysis, rank tracking, and website optimization.
- Core Web Vitals//Learn how to improve Core Web Vitals including LCP, INP, CLS, page speed, and overall user experience for better rankings.
- Keyword Research//Learn how to find profitable keywords, analyze search intent, evaluate competition, and build effective keyword strategies.
- Link Building//Master ethical link building techniques, backlink analysis, outreach methods, guest posting, and authority growth strategies.
- Google Search Console//Learn how to use Google Search Console to monitor indexing, fix errors, analyze search performance, and improve SEO.
- SEO Basics//Learn the fundamentals of search engine optimization (SEO Basics), including how search engines work, SEO terminology, and beginner-friendly best practices.
- Paid Media//
- Display Advertising//Learn display advertising strategies, banner ads, audience targeting, remarketing, Google Display campaigns, and optimization techniques.
- Google Ads//Learn Google Ads strategies, campaign setup, bidding, keywords, Performance Max, Search Ads, and optimization techniques.
- LinkedIn Ads//Learn LinkedIn Ads strategies for B2B marketing, lead generation, audience targeting, campaign optimization, and paid social advertising.
- Meta Ads//Learn Meta Ads strategies for Facebook and Instagram, including campaign setup, targeting, retargeting, and performance optimization.
- Paid Media Analytics//Learn paid media analytics, including CPC, CTR, CPA, ROAS, conversion tracking, attribution, reporting, and campaign performance analysis.
- PPC Strategy//Learn effective PPC strategies, campaign planning, bidding, keyword targeting, landing pages, conversion optimization, and more.
- Content//Transform your living spaces with inspiration, tips, and trends in interior design. From minimalist decor to bold statements, find ideas for every style and budget.
- Social//
- Digital Marketing//Explore stories and advice on living your best life. From personal growth to entertainment, dive into the latest in lifestyle trends and inspiration.
- Artificial Intelligence//Stay informed about health and wellness with expert advice, fitness tips, and the latest medical breakthroughs. Your guide to a healthier and happier life.
- Development//You will find development related educational articles
- GTM//Learn Google Tag Manager (GTM) with practical guides for tags, triggers, variables, tracking, conversions, and website analytics implementation.
- HTML//Learn HTML with simple tutorials, examples, tags, elements, attributes, and best practices for building modern web pages.
- HTML CSS//Learn HTML CSS together with practical tutorials, examples, layouts, styling techniques, responsive design, and modern web development practices.
- HTML JS//Learn HTML JS – JavaScript with practical tutorials and examples for adding interactivity, dynamic content, events, and functionality to web pages.
- JavaScript//Explore JavaScript tutorials, examples, concepts, and practical techniques for creating interactive and dynamic websites and web applications.
- PHP//Learn PHP programming with practical tutorials, examples, functions, syntax, and web development techniques for beginners and developers.
- Python//Learn Python programming with practical tutorials, examples, syntax, functions, automation techniques, and useful programming concepts.
- Home
- SEO
- Technical SEO
- GA4 Custom Event Tracking Using Google Tag Manager
GA4 Custom Event Tracking Using Google Tag Manager

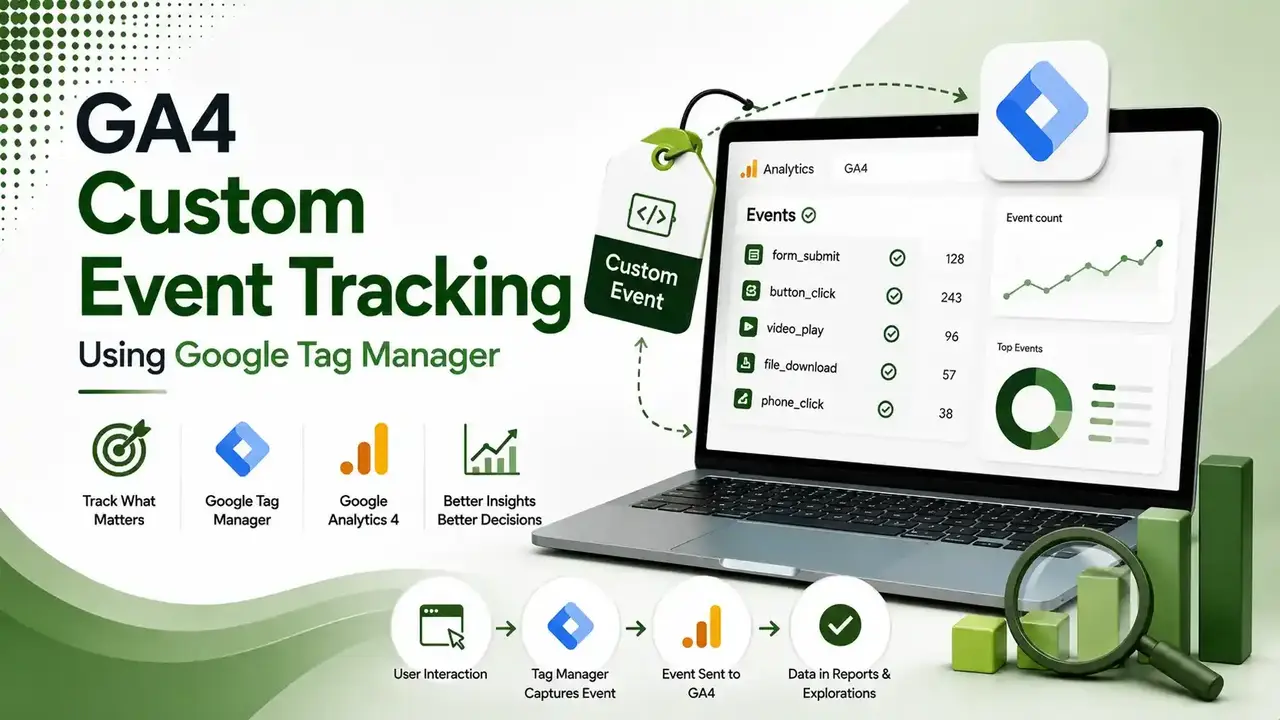
GA4 doesn't know what "sign up" means to your business. Here's the complete four-step custom event setup dataLayer push, GTM trigger, Data Layer Variables, GA4 tag with real code and a live snippet generator.
Table of Contents
ToggleGA4's automatic tracking catches page views and basic clicks. It does not know what a "sign up" means to your business, or which button on your pricing page actually matters. A custom event fills that gap, and building one through Google Tag Manager takes four steps, three of which involve zero coding beyond a single line of JavaScript.
A custom event in GA4 is an event you define yourself to track an interaction that GA4's automatic and enhanced measurement do not capture natively.
Built through Google Tag Manager, the process pushes data to the dataLayer, triggers a tag based on that push, and sends the result to GA4 as a named event with whatever parameters you choose.
We covered the reporting side of this in our GA4 events vs conversions guide. This article is the implementation half: the actual code and GTM configuration that makes a custom event exist in the first place.
components make up every custom event setup: dataLayer push, trigger, and tag
line of JavaScript is often all that's needed to push a custom event to the dataLayer
typical delay before a new custom event appears in GA4's standard reports
How a Custom Event Actually Travels From Click to Report
Step 1: Push the Event to the DataLayer
According to Google's official Tag Manager data layer documentation, every custom event starts with a dataLayer.push() call, either written directly in your site's code or triggered through a form library's callback.
dataLayer.push({
  'event': 'registrationComplete',
  'plan': 'pro_monthly',
  'user_type': 'new'
});
A basic dataLayer push, fired the moment a registration form completes successfully
Step 2: Create a Custom Event Trigger in GTM
According to Analytics Mania's guide to the GTM custom event trigger, the trigger's event name must match the dataLayer's event value exactly, since GTM matching is case-sensitive.
| GTM Setting | Value |
|---|---|
| Trigger Type | Custom Event |
| Event Name | registrationComplete |
| This trigger fires on | All Custom Events |
Step 3: Create Data Layer Variables for Your Parameters
Variable Type: Data Layer Variable
Data Layer Variable Name: plan
Variable Name in GTM: DLV - plan
Repeat this for each parameter pushed to the dataLayer, like plan and user_type
Step 4: Build the GA4 Event Tag
Create a New Tag
In GTM, go to Tags, click New, and select Google Analytics: GA4 Event as the tag type.
Link Your GA4 Configuration Tag
Select your existing GA4 Configuration tag so the event ties to the correct property and measurement ID.
Name the Event and Add Parameters
Enter sign_up as the event name, then add parameters like plan and user_type, mapping each to the Data Layer Variables created in Step 3.
Attach the Trigger and Publish
Select the Custom Event trigger built in Step 2, save the tag, test it in Preview mode, then publish the container.
Naming: DataLayer Event vs. GA4 Event Name
These do not have to match, and understanding why avoids a common point of confusion.
According to Owntag's guide to custom event tracking, the dataLayer event name is purely internal, used only to trigger the GTM tag. It never appears in GA4 reports directly.
The GA4 event name is what actually shows up in your reports. You could push registrationComplete to the dataLayer but name the resulting GA4 event sign_up instead, for consistency with Google's recommended event naming.
DataLayer Event Code Generator
Enter an event name and two parameters to generate the exact JavaScript to paste into your site.
DataLayer Event Code Generator
Generates a copy-paste dataLayer.push() snippet
When to Use a Custom Event vs. a Recommended Event
According to Analytics Mania's guide to custom events in GA4, Google's recommended events come with predefined parameters and are worth using whenever your interaction matches one, since analysts and future team members will recognize the naming convention immediately.
A genuinely custom event makes sense when no recommended event fits, such as a specific interaction unique to your product, like expanding a pricing comparison table or completing a multi-step configurator tool.
Server-Side Considerations for Custom Events
According to TAGGRS' documentation on setting up a GTM data layer, always sending events to GTM through a dataLayer.push rather than a direct gtag call keeps the setup portable, whether the container eventually moves to server-side tracking or stays entirely client-side.
Common Mistakes When Setting Up a Custom Event
According to CustomerLabs' guide to setting up custom events in GTM, including key variables like product ID or page URL in the dataLayer push, not just the event name alone, is what makes the resulting reports actually useful.
According to DataTrue's GA4 event tracking setup guide, forgetting to enter the GA4 Measurement ID correctly in the tag configuration is a common setup error that silently prevents events from ever reaching the property at all.
A third common mistake involves duplicate tags. Two separate GA4 event tags firing on the same trigger, often left over from earlier testing, send the same event twice, inflating counts across every report that references it.
Testing Before You Publish
According to Analytics Mania's guide referenced above, GTM's Preview mode shows the dataLayer event firing in real time. Clicking it confirms whether the GA4 event tag actually fired as expected.
Once the tag fires correctly in Preview mode, switching to GA4's DebugView confirms the event and its parameters arrived at the property with the correct values before publishing the container live to real visitors.
According to Owntag's guide referenced earlier, keeping a simple internal reference document listing every dataLayer event name, its GTM trigger, and its corresponding GA4 event name prevents naming drift as more people on a team start adding new tracking over time.
FAQs on GA4 Custom Event Tracking
Related Articles
> what_we_learn_today.log
Every custom event needs three parts: dataLayer push, GTM trigger, GA4 tag
The dataLayer event name and GA4 event name never have to match
Data Layer Variables map raw pushed values into usable GA4 parameters
Preview mode and DebugView both confirm setup before publishing live
New custom events can take up to 24 hours to appear in standard reports
A working custom event can later be promoted to a key event
Related Posts

Previous Post
Next Post
Previous Post
Next Post



- Artificial Intelligence
- Content
- Core Web Vitals
- Development
- Digital Marketing
- Display Advertising
- Google Ads
- Google Search Console
- GTM
- HTML
- HTML CSS
- JavaScript
- Keyword Research
- Link Building
- LinkedIn Ads
- Local SEO
- Meta Ads
- Mobile SEO
- Off-Page SEO
- On-Page SEO
- Paid Media
- Paid Media Analytics
- PHP
- PPC Strategy
- Python
- SEO
- SEO Basics
- SEO Tools
- Social
- Technical SEO