
- Home
- SEODiscover the latest updates from across the United States, including politics, culture, economy, and trending stories. Stay informed on the key events shaping the nation and the topics everyone’s talking about.
- Technical SEOLearn technical SEO concepts including crawling, indexing, XML sitemaps, robots.txt, canonical tags, site architecture, and website performance.
- Local SEOOptimize your business for local seo with Google Business Profile, local citations, reviews, maps, and location-based SEO.
- Mobile SEOImprove your website’s mobile seo performance with responsive design, mobile-first indexing, usability, and page speed optimization.
- On-Page SEOExplore on-page seo optimization techniques such as title tags, meta descriptions, headings, URLs, internal linking, and content optimization.
- Off-Page SEODiscover off-page SEO strategies such as backlinks, digital PR, brand mentions, outreach, and authority building.
- SEO ToolsExplore the best SEO tools for keyword research, technical audits, backlink analysis, rank tracking, and website optimization.
- Core Web VitalsLearn how to improve Core Web Vitals including LCP, INP, CLS, page speed, and overall user experience for better rankings.
- Keyword ResearchLearn how to find profitable keywords, analyze search intent, evaluate competition, and build effective keyword strategies.
- Link BuildingMaster ethical link building techniques, backlink analysis, outreach methods, guest posting, and authority growth strategies.
- Google Search ConsoleLearn how to use Google Search Console to monitor indexing, fix errors, analyze search performance, and improve SEO.
- SEO BasicsLearn the fundamentals of search engine optimization (SEO Basics), including how search engines work, SEO terminology, and beginner-friendly best practices.
- Paid Media
- Display AdvertisingLearn display advertising strategies, banner ads, audience targeting, remarketing, Google Display campaigns, and optimization techniques.
- Google AdsLearn Google Ads strategies, campaign setup, bidding, keywords, Performance Max, Search Ads, and optimization techniques.
- LinkedIn AdsLearn LinkedIn Ads strategies for B2B marketing, lead generation, audience targeting, campaign optimization, and paid social advertising.
- Meta AdsLearn Meta Ads strategies for Facebook and Instagram, including campaign setup, targeting, retargeting, and performance optimization.
- Paid Media AnalyticsLearn paid media analytics, including CPC, CTR, CPA, ROAS, conversion tracking, attribution, reporting, and campaign performance analysis.
- PPC StrategyLearn effective PPC strategies, campaign planning, bidding, keyword targeting, landing pages, conversion optimization, and more.
- ContentTransform your living spaces with inspiration, tips, and trends in interior design. From minimalist decor to bold statements, find ideas for every style and budget.
- Social
- Digital MarketingExplore stories and advice on living your best life. From personal growth to entertainment, dive into the latest in lifestyle trends and inspiration.
- Artificial IntelligenceStay informed about health and wellness with expert advice, fitness tips, and the latest medical breakthroughs. Your guide to a healthier and happier life.
- DevelopmentYou will find development related educational articles
- GTMLearn Google Tag Manager (GTM) with practical guides for tags, triggers, variables, tracking, conversions, and website analytics implementation.
- HTMLLearn HTML with simple tutorials, examples, tags, elements, attributes, and best practices for building modern web pages.
- HTML CSSLearn HTML CSS together with practical tutorials, examples, layouts, styling techniques, responsive design, and modern web development practices.
- HTML JSLearn HTML JS – JavaScript with practical tutorials and examples for adding interactivity, dynamic content, events, and functionality to web pages.
- JavaScriptExplore JavaScript tutorials, examples, concepts, and practical techniques for creating interactive and dynamic websites and web applications.
- PHPLearn PHP programming with practical tutorials, examples, functions, syntax, and web development techniques for beginners and developers.
- PythonLearn Python programming with practical tutorials, examples, syntax, functions, automation techniques, and useful programming concepts.
- Home
- SEODiscover the latest updates from across the United States, including politics, culture, economy, and trending stories. Stay informed on the key events shaping the nation and the topics everyone’s talking about.
- Technical SEOLearn technical SEO concepts including crawling, indexing, XML sitemaps, robots.txt, canonical tags, site architecture, and website performance.
- Local SEOOptimize your business for local seo with Google Business Profile, local citations, reviews, maps, and location-based SEO.
- Mobile SEOImprove your website’s mobile seo performance with responsive design, mobile-first indexing, usability, and page speed optimization.
- On-Page SEOExplore on-page seo optimization techniques such as title tags, meta descriptions, headings, URLs, internal linking, and content optimization.
- Off-Page SEODiscover off-page SEO strategies such as backlinks, digital PR, brand mentions, outreach, and authority building.
- SEO ToolsExplore the best SEO tools for keyword research, technical audits, backlink analysis, rank tracking, and website optimization.
- Core Web VitalsLearn how to improve Core Web Vitals including LCP, INP, CLS, page speed, and overall user experience for better rankings.
- Keyword ResearchLearn how to find profitable keywords, analyze search intent, evaluate competition, and build effective keyword strategies.
- Link BuildingMaster ethical link building techniques, backlink analysis, outreach methods, guest posting, and authority growth strategies.
- Google Search ConsoleLearn how to use Google Search Console to monitor indexing, fix errors, analyze search performance, and improve SEO.
- SEO BasicsLearn the fundamentals of search engine optimization (SEO Basics), including how search engines work, SEO terminology, and beginner-friendly best practices.
- Paid Media
- Display AdvertisingLearn display advertising strategies, banner ads, audience targeting, remarketing, Google Display campaigns, and optimization techniques.
- Google AdsLearn Google Ads strategies, campaign setup, bidding, keywords, Performance Max, Search Ads, and optimization techniques.
- LinkedIn AdsLearn LinkedIn Ads strategies for B2B marketing, lead generation, audience targeting, campaign optimization, and paid social advertising.
- Meta AdsLearn Meta Ads strategies for Facebook and Instagram, including campaign setup, targeting, retargeting, and performance optimization.
- Paid Media AnalyticsLearn paid media analytics, including CPC, CTR, CPA, ROAS, conversion tracking, attribution, reporting, and campaign performance analysis.
- PPC StrategyLearn effective PPC strategies, campaign planning, bidding, keyword targeting, landing pages, conversion optimization, and more.
- ContentTransform your living spaces with inspiration, tips, and trends in interior design. From minimalist decor to bold statements, find ideas for every style and budget.
- Social
- Digital MarketingExplore stories and advice on living your best life. From personal growth to entertainment, dive into the latest in lifestyle trends and inspiration.
- Artificial IntelligenceStay informed about health and wellness with expert advice, fitness tips, and the latest medical breakthroughs. Your guide to a healthier and happier life.
- DevelopmentYou will find development related educational articles
- GTMLearn Google Tag Manager (GTM) with practical guides for tags, triggers, variables, tracking, conversions, and website analytics implementation.
- HTMLLearn HTML with simple tutorials, examples, tags, elements, attributes, and best practices for building modern web pages.
- HTML CSSLearn HTML CSS together with practical tutorials, examples, layouts, styling techniques, responsive design, and modern web development practices.
- HTML JSLearn HTML JS – JavaScript with practical tutorials and examples for adding interactivity, dynamic content, events, and functionality to web pages.
- JavaScriptExplore JavaScript tutorials, examples, concepts, and practical techniques for creating interactive and dynamic websites and web applications.
- PHPLearn PHP programming with practical tutorials, examples, functions, syntax, and web development techniques for beginners and developers.
- PythonLearn Python programming with practical tutorials, examples, syntax, functions, automation techniques, and useful programming concepts.
Now Reading: Build Your First AI Chatbot Using OpenAI API
-
01
Build Your First AI Chatbot Using OpenAI API
- Home//
- SEO//Discover the latest updates from across the United States, including politics, culture, economy, and trending stories. Stay informed on the key events shaping the nation and the topics everyone’s talking about.
- Technical SEO//Learn technical SEO concepts including crawling, indexing, XML sitemaps, robots.txt, canonical tags, site architecture, and website performance.
- Local SEO//Optimize your business for local seo with Google Business Profile, local citations, reviews, maps, and location-based SEO.
- Mobile SEO//Improve your website’s mobile seo performance with responsive design, mobile-first indexing, usability, and page speed optimization.
- On-Page SEO//Explore on-page seo optimization techniques such as title tags, meta descriptions, headings, URLs, internal linking, and content optimization.
- Off-Page SEO//Discover off-page SEO strategies such as backlinks, digital PR, brand mentions, outreach, and authority building.
- SEO Tools//Explore the best SEO tools for keyword research, technical audits, backlink analysis, rank tracking, and website optimization.
- Core Web Vitals//Learn how to improve Core Web Vitals including LCP, INP, CLS, page speed, and overall user experience for better rankings.
- Keyword Research//Learn how to find profitable keywords, analyze search intent, evaluate competition, and build effective keyword strategies.
- Link Building//Master ethical link building techniques, backlink analysis, outreach methods, guest posting, and authority growth strategies.
- Google Search Console//Learn how to use Google Search Console to monitor indexing, fix errors, analyze search performance, and improve SEO.
- SEO Basics//Learn the fundamentals of search engine optimization (SEO Basics), including how search engines work, SEO terminology, and beginner-friendly best practices.
- Paid Media//
- Display Advertising//Learn display advertising strategies, banner ads, audience targeting, remarketing, Google Display campaigns, and optimization techniques.
- Google Ads//Learn Google Ads strategies, campaign setup, bidding, keywords, Performance Max, Search Ads, and optimization techniques.
- LinkedIn Ads//Learn LinkedIn Ads strategies for B2B marketing, lead generation, audience targeting, campaign optimization, and paid social advertising.
- Meta Ads//Learn Meta Ads strategies for Facebook and Instagram, including campaign setup, targeting, retargeting, and performance optimization.
- Paid Media Analytics//Learn paid media analytics, including CPC, CTR, CPA, ROAS, conversion tracking, attribution, reporting, and campaign performance analysis.
- PPC Strategy//Learn effective PPC strategies, campaign planning, bidding, keyword targeting, landing pages, conversion optimization, and more.
- Content//Transform your living spaces with inspiration, tips, and trends in interior design. From minimalist decor to bold statements, find ideas for every style and budget.
- Social//
- Digital Marketing//Explore stories and advice on living your best life. From personal growth to entertainment, dive into the latest in lifestyle trends and inspiration.
- Artificial Intelligence//Stay informed about health and wellness with expert advice, fitness tips, and the latest medical breakthroughs. Your guide to a healthier and happier life.
- Development//You will find development related educational articles
- GTM//Learn Google Tag Manager (GTM) with practical guides for tags, triggers, variables, tracking, conversions, and website analytics implementation.
- HTML//Learn HTML with simple tutorials, examples, tags, elements, attributes, and best practices for building modern web pages.
- HTML CSS//Learn HTML CSS together with practical tutorials, examples, layouts, styling techniques, responsive design, and modern web development practices.
- HTML JS//Learn HTML JS – JavaScript with practical tutorials and examples for adding interactivity, dynamic content, events, and functionality to web pages.
- JavaScript//Explore JavaScript tutorials, examples, concepts, and practical techniques for creating interactive and dynamic websites and web applications.
- PHP//Learn PHP programming with practical tutorials, examples, functions, syntax, and web development techniques for beginners and developers.
- Python//Learn Python programming with practical tutorials, examples, syntax, functions, automation techniques, and useful programming concepts.
- Home
- Artificial Intelligence
- Build Your First AI Chatbot Using OpenAI API
Build Your First AI Chatbot Using OpenAI API

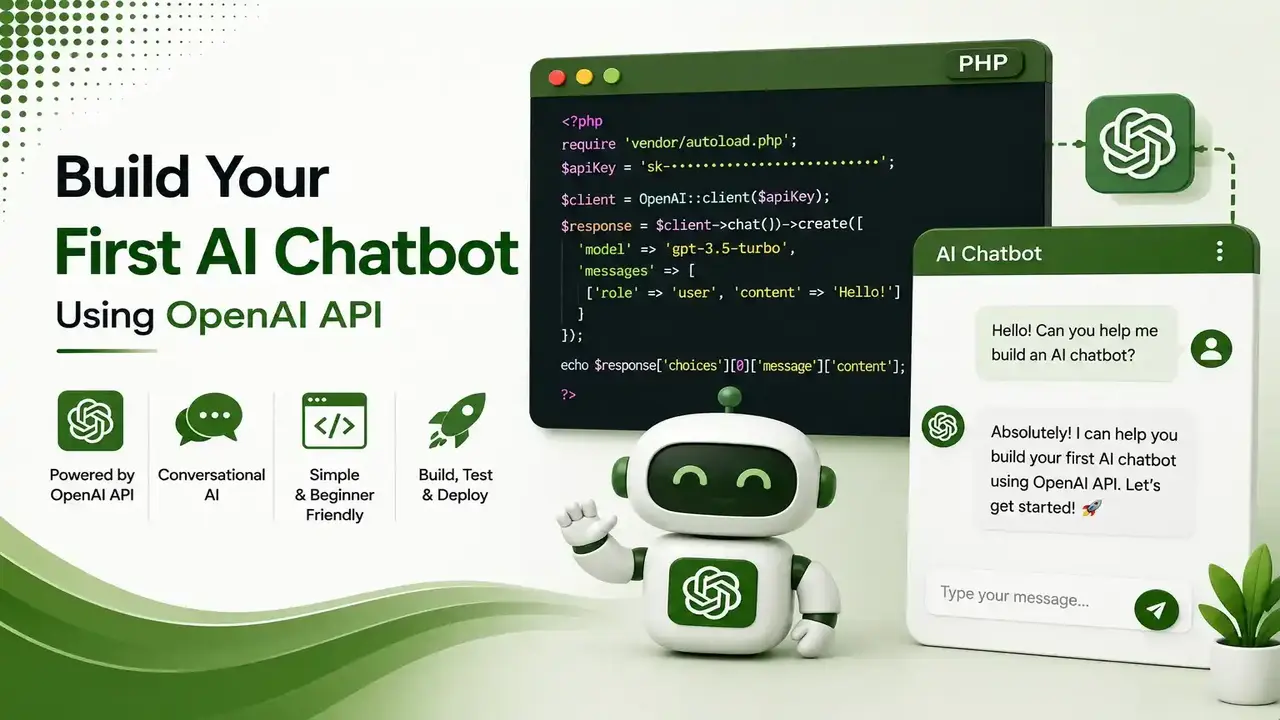
Building an AI chatbot used to mean training your own model. Now it means calling an API. Complete working code Express backend, chat frontend, conversation memory plus a live cost calculator using real 2026 pricing.
Table of Contents
ToggleBuilding an AI chatbot used to mean training your own language model. Today it means calling an API. This guide builds a genuinely working AI chatbot, backend and frontend, using the OpenAI API and Node.js, in roughly the time it takes to read through it once.
An AI chatbot built on the OpenAI API works by sending user messages to OpenAI's chat completions endpoint through a backend server, then returning the model's response to a frontend chat interface.
The backend exists specifically to keep your API key hidden from anyone viewing the page's source code.
We covered the strategic side of AI agents in our AI agent guide. This article is the hands-on build: real, working code for an actual AI chatbot, end to end.
per 1 million input tokens using OpenAI's cost-effective gpt-4o-mini model
parts every AI chatbot needs: a backend that calls the API, and a frontend chat UI
rule above all others: never call the OpenAI API directly from frontend JavaScript
How This AI Chatbot Is Structured
Never put your OpenAI API key in frontend JavaScript. Anyone viewing your page's source code could copy it and run up charges on your account. Always route requests through a backend server, as shown below.
Step 1: Project Setup
According to a tutorial on building a chatbot with the OpenAI API and Node.js, four packages cover everything this AI chatbot needs.
# Create a new project folder
mkdir ai-chatbot && cd ai-chatbot
npm init -y

# Install dependencies
npm install express openai dotenv cors
Four packages: a web server, the official OpenAI SDK, environment variable support, and CORS handling
# .env file, keep this out of version control
OPENAI_API_KEY=sk-your-actual-key-here
PORT=5000
Store your API key here, never directly in your code
Step 2: The Backend Server
This Express server exposes a single /chat endpoint that receives a message and returns the AI chatbot's response, using the official openai npm package.
// server.js
import express from 'express';
import cors from 'cors';
import dotenv from 'dotenv';
import OpenAI from 'openai';

dotenv.config();

const app = express();
app.use(cors());
app.use(express.json());

const openai = new OpenAI({ apiKey: process.env.OPENAI_API_KEY });

app.post('/chat', async (req, res) => {
  const { message } = req.body;
  if (!message) {
    return res.status(400).json({ error: 'Message is required' });
  }

  try {
    const completion = await openai.chat.completions.create({
      model: 'gpt-4o-mini',
      messages: [
        { role: 'system', content: 'You are a helpful, concise assistant.' },
        { role: 'user', content: message }
      ],
      temperature: 0.7,
      max_tokens: 300
    });

    res.json({ reply: completion.choices[0].message.content });
  } catch (error) {
    console.error('OpenAI API error:', error.message);
    res.status(500).json({ error: 'Something went wrong' });
  }
});

app.listen(process.env.PORT || 5000, () => {
  console.log('AI chatbot server running');
});
The complete backend: receives a message, calls OpenAI, returns the reply as JSON
Step 3: The Frontend Chat Interface
<div id="chat-window"></div>
<input type="text" id="chat-input" placeholder="Type a message...">
<button onclick="sendMessage()">Send</button>

<script>
async function sendMessage() {
  const input = document.getElementById('chat-input');
  const message = input.value.trim();
  if (!message) return;

  appendMessage('user', message);
  input.value = '';

  const response = await fetch('/chat', {
    method: 'POST',
    headers: { 'Content-Type': 'application/json' },
    body: JSON.stringify({ message })
  });

  const data = await response.json();
  appendMessage('bot', data.reply || 'Something went wrong.');
}

function appendMessage(sender, text) {
  const window_ = document.getElementById('chat-window');
  window_.innerHTML += `<p><strong>${sender}:</strong> ${text}</p>`;
}
</script>
A minimal chat UI: no framework required, just fetch() talking to your own backend
Step 4: Adding Conversation Memory
According to Cloudinary's guide to building a developer chatbot with OpenAI, the model itself has no memory between separate API calls, so the full conversation array must be resent every time.
The basic version above forgets everything after each message. Passing the full conversation history back to the API gives the AI chatbot actual memory.
// Track conversation on the frontend
let conversationHistory = [
  { role: 'system', content: 'You are a helpful, concise assistant.' }
];

// Inside sendMessage(), before the fetch call:
conversationHistory.push({ role: 'user', content: message });

// Send the full history instead of a single message
body: JSON.stringify({ messages: conversationHistory })

// After getting a reply, add it to history too
conversationHistory.push({ role: 'assistant', content: data.reply });
Update the backend's messages field to accept req.body.messages instead of a single string
Cost Estimator for Your AI Chatbot
According to a complete 2026 tutorial on using the ChatGPT API, gpt-4o-mini pricing sits at $0.15 per million input tokens and $0.60 per million output tokens, making it dramatically cheaper than larger models for most AI chatbot use cases.
Estimate your monthly OpenAI API cost based on expected conversation volume.
AI Chatbot Cost Estimator
Based on gpt-4o-mini pricing: $0.15 per 1M input tokens, $0.60 per 1M output tokens
Enter your numbers above to estimate monthly cost.
Key Parameters That Shape Your AI Chatbot's Behavior
According to a complete guide to the OpenAI Chat Completion API, understanding these four parameters covers most of what shapes an AI chatbot's actual behavior.
| Parameter | What It Controls |
|---|---|
system role message | Sets the AI chatbot's personality, tone, and behavior rules |
temperature | 0 for focused, predictable answers; up to 1+ for more creative variation |
max_tokens | Caps response length, directly controlling cost per reply |
model | gpt-4o-mini for cost-efficiency; larger models for more complex reasoning |
Deploying Your AI Chatbot
Choose a Hosting Platform
According to DEV Community's complete guide to building an AI chatbot, platforms supporting Node.js directly work well for small to medium chatbot deployments without added infrastructure complexity.
Set Environment Variables on the Host
Add your OPENAI_API_KEY as an environment variable in your hosting platform's dashboard, never committed to your code repository.
Add Rate Limiting Before Going Live
According to freeCodeCamp's guide to building a chatbot with OpenAI, Node.js, and React, without limits, a single visitor sending rapid requests can generate unexpected costs. Basic rate limiting middleware protects against this before real traffic arrives.
FAQs on Building an AI Chatbot With OpenAI API
Related Articles
> what_we_learn_today.log
An AI chatbot needs two parts: a backend calling OpenAI, and a frontend chat UI
Never expose your API key in frontend JavaScript, ever
The system role message sets the chatbot's personality and behavior rules
Conversation memory requires sending the full message history each request
gpt-4o-mini balances cost and capability for most chatbot use cases
Add rate limiting before deploying publicly to control unexpected costs
Related Posts
Previous Post
Next Post
Previous Post
Next Post




- Artificial Intelligence
- Content
- Core Web Vitals
- Development
- Digital Marketing
- Display Advertising
- Google Ads
- Google Search Console
- GTM
- HTML
- HTML CSS
- JavaScript
- Keyword Research
- Link Building
- LinkedIn Ads
- Local SEO
- Meta Ads
- Mobile SEO
- Off-Page SEO
- On-Page SEO
- Paid Media
- Paid Media Analytics
- PHP
- PPC Strategy
- Python
- SEO
- SEO Basics
- SEO Tools
- Social
- Technical SEO